

We have these wine bottles. Don't ask me how they got here.
TRUTH: (I know how they got here, but I was hoping to infer that they just appeared one day on their own.)
Anyway I would have thrown away the evidence but not so, my mother.
We saved them for a while because our neighbor makes homemade wine and we were going to take them to him, but like other well-intentioned ideas gone awry, they linger unfilled.
We have had some bad weather here and my mother has been unable to engage in her passion for digging in the dirt in her yard so she was turning her attention to the dirt here on the inside of the house. (I'm talking dusting, vacuuming, chasing spider webs, etc.) So in an effort to stop that before it got out of hand, I asked her to help me do a little crafting.
Now before you think I am clever or that she isn't aware of my bait and switch, think again. She knows all my tricks and sometimes she allows me to think I am getting away with something. But I digress.
Here is the bottle we created and a sort-of tutorial on what we did to get it to this point.

Finished wine bottle
Here are some things you will need to get this party rolling.
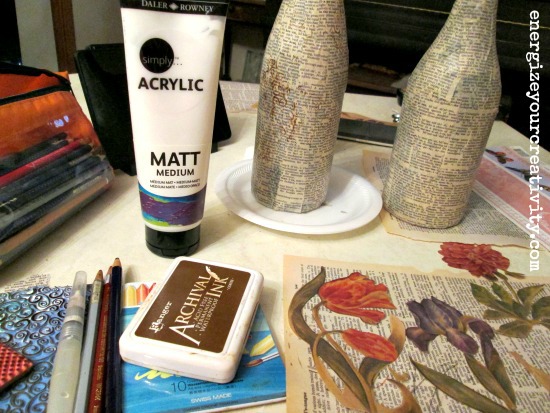
Some of the supplies we used.
Wine bottle
Old book pages
Decoupage glue or acrylic matt medium and a brush to put it on with. We used a 1" brush.
Foam plates as a pallet for matt medium and/or paint
Container of water to wash out brushes
Scissors
Images to glue on for decoration. We used botanicals and butterflies from scrapbook paper
Gesso
Coloring tools of your choice: acrylic paint, watercolor pencils or crayons, spray ink, rubber stamps and ink pad, etc.
Bling

Sacrificial wine bottle
Make sure it's empty. Go ahead, drain it. I'll wait.
Start with your empties. (I highly recommend they be empty because you know what would happen if there wasn't a drop of wine in the house and you knew that the lovely decorated bottle had wine in it and you were having a moment that required a smidgen of wine: Decorations be damned! Or maybe that's just me.)

Old dictionary pages
Since I have lots of old book paper, I tore out some sheets then tore them into narrow strips and mom started slathering on the matt medium and slapping on the strips around the diameter of the bottle.

Old paper decoupaged on bottle
When you are finished it looks sort of like this. Be sure to put a coat of matt medium over the entire bottle so you have an even work surface to start adding colors, stamping or stencils and images. Allow to dry fully. Now the fun part begins.

Put a little or a lot of gesso as you like
I did some spots of thinned gesso in places to make the writing fade into the background. I added rubber stamp images in places.

Add color.
I love using watercolor pencils or crayons. I began to add color using watercolor crayons and watercolor pencils. I was too lazy to go get the acrylic paint but that works as well.

Cut out images
When the background is finished and drying, cut out your images. Mom is a whiz at this.
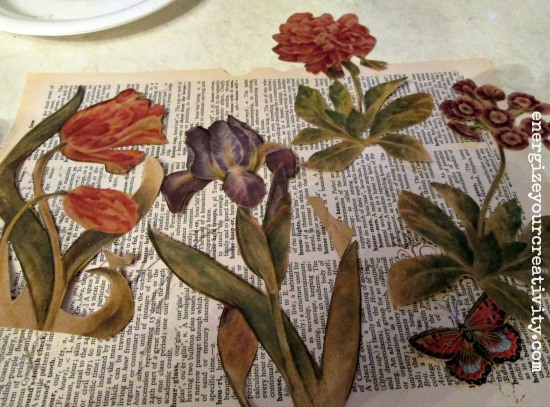
We cut out more than we needed for one bottle

Fiddle with placement
Decide where you want your images and apply to bottle with matt medium.

Add some doodle, jewels, sparklesAdd more color where needed. Doodle. Glue on gee gaws. Outline your images so they pop. Have fun. Pretend you just drank a glass of courage and have no fear of making mistakes. Have fun. Then decide how you will display yours.


One side of upcycled wine bottle Altered wine bottle side twoI hope you are inspired to upcycle your old bottles. We had fun and I didn't have to clean house. Pretty good trade off. Thanks Mom!